On the last day of wet clay, I decided to make a teapot for my wheel and hand project. Something that you start on the wheel, and then change the piece, by adding something made by hand. I started by making a base. Then the spout. All I had time to do today was make all of these and the lid. Not so sure that the lid is going to fit very well. I was in a hurry...
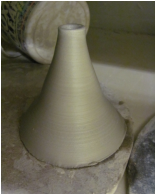
Here is the spout, that I made today for my teapot. I have never before made a spout, and had to ask Mrs. H for help. Shes started it off, showing me what to do, and then I finished it. After I centered, I got to compress the clay to the point where you could see the wheel. Then to make this shape you have to pull up the wall. but instead of pulling straight up, you have to pull at an angel. Then after that, you have to "choke" the wall, to make it skinnier. And repeat,
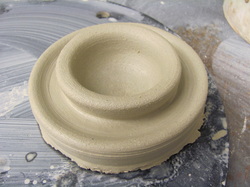
The last piece I made today was the lid. I was in a hurry, and so my lid is a little off center. This was the second lid that I made today too. I will eventually add a handle to the top. The very last piece that I have to make for this tea pot is the handle. After I make the handle, and let it dry, I can start adding to the top of this lid. :)
After a week, from getting my lidded project from the bisque it all went down hill from there. Only a few hours out of the klim the lid broke after accidently getting knocked of the counter. Luckly we could glue it together. I decided way before I even made the project that I wanted to glaze it with a white glaze. I had to make the glaze as there wasn't any white glaze available.... To make the glaze you have to get two buckets and clean them out. Then you mix four to five cup of white powderd glaze with four to five cup of water in one bucket. Sir, until well blended. Next you have to siff the glaze into the other bucket. Then its ready. I used the white glaze, and it covered the grey cement glue well. I then added a bunch of swirles with blue stain. After the project came out, it looked alright. Then an edge broke off when the extra glaze off the bottom was getting chipped off. Nothing a little glue couldn't fix.
Lidded Right after it came out of the Bisque!
I know that it takes time to make something. "to bring art into the world." but I haven't been
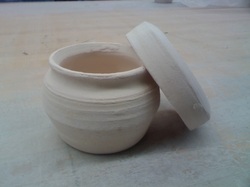
able to make anything that i could even attempt calling a lid. I wasn't so sure that this was a lid either when I made it today. I was VERY excited to learn that this could work as a lid for my project. and it does fit on my jar!! Although with this lid, I mixed up the steps in order to make it... I didn't pull the inside out first. Hopefully it will be okay once I foot it. How you foot a lid? I haven't got a clue.
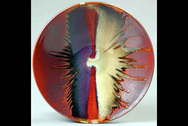
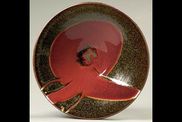
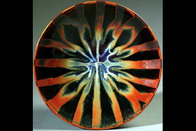
For my artist I choose to blog about Matthew Patton. He is a professional ceramic artist in Seattle since the 1980's. "My work is primarily decorative with a heavy emphasis on glaze effects." Patton creates many plates with vibrant glazes that tend to mix and clash together. In his early years the plates were made so anyone could eat off of them, and now "no one will ask if it's dishwasher safe anymore." Patton doesn't want to look at his art as something that someone is going to eat off of but rather a surface for his art. I choose patton because when I think about what i am going to glaze my projects I normally tend to stick with one color. while adding more colors that clash can come out looking.... like this
Matthew has made me realize that art doesn't need to perfect. and it doesn't always turn out the way you think or plan it to. art should be something fun. and it shouldn't be for others it should be for you.
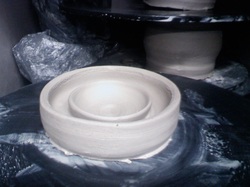
Wet lidded project off the wheel.
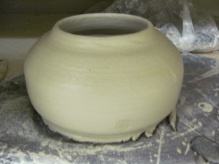
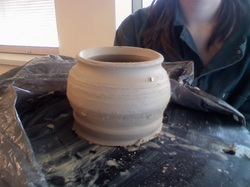
The first project of the second quarter is the lidded project. This is the first lidded project I have made. Ever. I gave an origional cylinder a "tummy". Making it into a jar. Almost like a honey jar..
Second quater started on the second of november. First project is a lidded one. Two pieces.
After making my pitcher yesterday, today I made my handle. I had to watch a video about making handles. I really liked the video because you get to see how to make a handle, instead of looking at notes... First you have to get some bagged clay, and cut a triangle out from it. Then you have to womp the clay onto something that looks more like a triangle with four sides. After that you take the clay and hold it at the top, dip it in water, and start to pull down making the clay longer. After you get the length you want you bend the clay to the other side. You have to wait 10 mintues to let the clay dry a little. On my handle I attempted to twist the clay, for a different look. I will post pictures tomorrow when I attach the handle to the pitcher. I also glazed my wide project today.
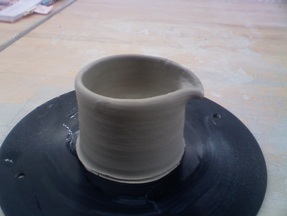
I'm not sure, I could be wrong, if I am ever going to make a tall project when I sit down and say, "I AM going to make a tall project today!" This is what happened when I tired to do just that... I am going to make a pitcher out of this. Tomorrow I am going to make a handle. After I got a little too confident when I was bringing the sides up I lost focus and I started to spin the wheel a little too fast and broke the top. And so
I made a lip.
Footing an Altered project.
This is the 'before' picture of my altered wheel project, before I started to shave away maybe too much clay. I had some problems with this footing job. First my project was lopsided, and so I had to take some of the clay of the top, so it wouldn't wobble on the wheel... Then the clay that was holding my project on the wheel would give way and the alter would move off center. Centering this was also hard, since the top isn't round, but rather curvy.
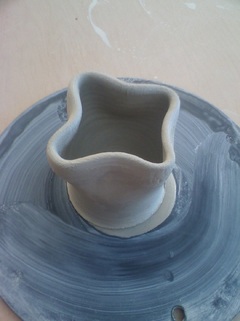
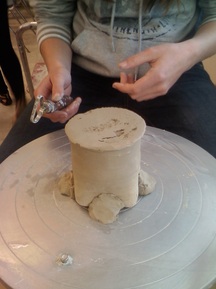
I started on the wheel determinded to make a tall project. I thought I had centered the clay... Turned out it wasn't centered after all. I was going to give a box shape to my altered project, but decided I like this rounder shape better. I turned my "tall" into an altered project by pushing in the walls of my clinder. I am glad to say that this is my tallest project so far this year!!! I am starting to get the hang of bringing the walls up, I think. Although it's not going to be perfect for a while. The walls on this wheel alter are also too thick to be a tall project...
 RSS Feed